| Sharp IM-MT880 Portable NetMD Recorder |
| http://www.minidisc.org/brian_youn/immt880/index.html |
|
|
| Written by Brian Youn [[email protected]] |
|
Review Index
Page 1 - MT880 General Info
Page 2 - General Operation
Page 3 - NetMD/OpenMG |
Operating the IM-MT880[This page covers realtime recording with the Sharp MT880, through the audio line/optical and mic inputs, as well as general operation of the unit itself; if you're looking for info on operating the unit via the NetMD USB interface, or on "recording" or downloading music from the PC to the MD via the NetMD USB interface, head over to Page 3]Recording with the MT880Sharp has traditionally held an advantage over Sony units when it comes to live recording, largely in part to the ability of Sharp units to easily adjust the recording level during recording. (while recent Sony units finally allow the user to do the same, they still require you to change the RecVolume setting in the menu to Manual while the recording is paused, EVERYTIME you start a new recording). Sharp has actually managed to throw users a bone by separating the text display (on the remote) and the level meter (on the main unit) into two different places, but they make up for some of that by placing a record button on the remote, as well as on the main unit. To their credit, most of the essential controls for recording still remain on the main unit, but the lack of a text display can make it difficult to see exactly what you are doing and how much time you have left in recording.
Synchro RecordingThe MT880 also supports Synchro recording for all of the audio inputs. The MT880's SYNC recording works particularly well with analog inputs, as well as with microphone recordings. SYNC recording is turned on by pressing the SYNC button while you are in record-standby; recording will then start when an input signal is first detected. If the input signal goes silent (or low) for 3 seconds, then it will automatically pause, and resume recording whenever an input signal is detected again. For recordings done through the mic-input, there are two selectable SYNC modes (HIGH and LOW) that determine the threshold level at which the recorder decides that there is no input signal; if the input signal drops below that threshold for more than 2 seconds, it will automatically pause. This works incredibly well for recording lectures and meetings, as it will automatically pause out any large segments of virtual silence. This is one feature in particular that Sony users can only dream about; most Sony units only support SYNC recording for optical-input recordings, and not for analog line-in or mic-in recordings.MDLP (MiniDisc Long Play)The Sharp MT880 supports MDLP, and you can switch between the different recording modes by pushing the MODE button (on either the main unit or the remote) while you are in record-standby. SP (292 kbps) is the standard mode that will yield the highest level of sound quality; MONO SP (292 kbps) doubles the recording time, but does not provide any stereo seperation; LP2 (132 kbps) will double your total recording time (148 minutes on a 74 minute disc), with a very slight sacrifice in sound quality -- roughly comparable to a 160 kbps mp3 file; LP4 will quadruple the recording time, but with a more noticeable reduction in sound quality (not recommended for music recordings, but fine for voice recordings such as lectures, etc.) SP and MONO SP are the only two modes that are backwards-compatible with older, pre-MDLP units (such as the Sharp MT831 or the MT722); if you plan on playing back recordings on another MD unit besides the MT880, then you might want to take this into consideration. Most MD units introduced in the last year fully support MDLP modes.Group ModeThe MT880 also supports the Group mode function, which allows you to organize songs into "folders". This is especially useful if you end up with discs containing large (40+) numbers of songs. When recording a new track on a disc that has groups already defined, the MT880 will by default record into a new group; however you can cancel the group mode recording (and record into the non-grouped pool of tracks) by holding the GROUP button for 2 seconds. The various group editing functions are covered below in the EDITING section.Adjusting Recording Levels - Automatic Gain Control (AGC)All Sharp units (the MT880 included) allow you to change the recording volume level during the actual recording (where as Sony units force the user to pause the recording first and enter a menu to change the settings). Simply use the |<< and >>| buttons to adjust the input level up and down either while in standby, or while recording. Input levels can be adjusted for any of the inputs (older models--MT821 and older -- did not allow you to adjust the recording levels of a digital recording). There is no automatic gain control (AGC) for the analog line/mic inputs as there is on the Sony units, so recording levels do need to be monitored and set appropriately. (Automatic Gain Control - AGC - normalizes the input signal -- "squashing" the signal if it gets too high, and boosting it if it gets too low; while AGC sounds good in theory, it's really not recommended if you want the best audio quality; however it can be nice for casual recording situations.) Sharp units do not have AGC, and force the user to set the recording levels manually so that they do not clip.
Recording immediately after changing discsThis is one of the few areas of recording where Sony holds a significant advantage over Sharp units. On the MT880 (as with any Sharp unit), when you insert a disc and push RECORD, the user must wait for the unit to read the User Table of Contents (UTOC) of the disc (which takes about 8 or 9 seconds) before the recording actually starts. If you are recording a live event and are in a rush, this can be bad news as it can cost you to miss a few invaluable seconds of a recording. In contrast, when you insert a new disc into the Sony MZ-N1 and hit record, the unit will begin recording almost immediately (there is actually about a one-second delay, but very slight), even while the TOC is being read. This is accomplished by storing the first few seconds of the input signal into the buffer, then writing it after the TOC has been read. This will prevent you from losing the first 7 or 8 seconds of a recording if you are in a hurry, or changing discs during a concert, or lecture, etc.Time/Date Stamp - LP StampUnfortunately the MT880 does not put a time/date stamp on its recordings, as the Sony MZ-N1 will do. The MT880 is also not capable of reading time/date stamps of recordings that were done in other units.Another option that is available on the N1, but absent on the MT880, is the option to prepend an "LP:" to the track title of every recording done in an LP mode (either LP2 or LP4). The Sharp MT880 will not add an "LP:" marker to LP track titles, and does not have any such option (the Sony N1 has a similar option, which is switchable). This option would be useful if you play your recordings on older units that don't support MDLP; if you try to play a track recorded in LP2 or LP4 on a pre-MDLP unit (remember, MDLP was only introduced in late 2000), you will simply hear silence. However if that track was LP-stamped, then you will see a "LP:" at the beginning of the track title, to show you why you are not hearing any sound. Playback/General OperationPlaying back discs on the MT880 is pretty straight-forward. To turn the unit on, simply put a disc into the unit and close the lid. The display will then say "HELLO!", then flash the current volume level and the current bass level. If the unit already has a disc inside, then giving the play button a firm push will turn the unit on -- a light "tap" of the play button won't turn it on, you need to give it a firm push (note that the only other button that will turn the unit on is the RECORD button). To turn the unit off, simply push the STOP button while the disc is stopped; the text display on the remote will flash "GOODBYE!"; or if you leave the unit alone with the disc stopped for one minute, it will turn off by itself.
Transitions between tracksWhen playing a disc in the MT880's RANDOM or 1 REPEAT play mode, there is a short audible gap when playback reaches the end of a track and transitions to the next. During normal playback the transitions between tracks are seamless however. If you need quick, seamless transitions between tracks for all shuffle/program/repeat modes, then you're out of luck with the MT880, and may want to look to a Sony portable.Motor NoiseThe Sharp MT880 is an extremely quiet unit, when it comes to the motor noise generated by the movement of the optical pick-up. The MT880 is even quieter than the N1, which is good news if you do a lot of live/environmental recordings against extremely quiet backgrounds. By contrast, the Sony N1 emits an occasionaly "whirring" noise that can be picked up by a microphone if it is close enough to the unit's body.Disc Access SpeedThe disc access/motor response speed of the MT880 is fairly good, certainly holding its own against the Sony MZ-N1. The one area in which I think response time is really worth mentioning is the quick response time to FF/RW operations. Generally, if you want to do an audible fast-rewind, the Sony MZ-N1 (as with most recent Sony units) forces you to hold the |<< button down for about 3-4 seconds before it actually starts cueing backwards. The Sharp MT880 is much faster in responding to FF/RW operations, usually taking less than a second to start cueing. The table below details some access/response time comparisons between the Sony MZ-N1 and the Sharp MT880.
EditingEditing functions on Sharp units have been a liability when compared to Sony models, since Sharp machines only allow you to access the editing functions while paused or stopped. While the MT880 is no different, at least the 880 has NetMD functionality, which allows the user to perform some of the editing functions on the PC (titling, moving, and group functions can all be done from the PC, but track dividing and combining cannot).Aside from the NetMD interface, the MT880's editing functions can only be accessed via the remote. Sharp leaves you with no way to access the editing functions (among other things) if you are without the remote control. Menu optionsSharp has consolidated the majority of its functions into a menu system, which can be accessed from the remote control (if you don't have the remote, there is unfortunately no way to enter the menu system).
While playing:
While stopped:
Explanation of the setup optionsBEEP allows you to turn on/off the "beep" that occurs whenever you push a button on the remote or the main unit. There is only one option to toggle the beep, and it affects both the main unit and remote, unlike the Sony N1 which has seperate options for MAIN UNIT and REMOTE.AutoPlay begins playback of a write-protected disc as soon as you put it in, without you having to press PLAY. PowerSave is an interesting option that Sharp has made available on all of the MD units for some time now. When turned on, the MD unit motor saves power by only reading from the disc for a few seconds at a time to fill up the 40-second buffer. The motor then turns off for the next 40 seconds (if you're in SP mode; 80 seconds and 160 seconds in LP2 and LP4 modes, respectively), before turning on again to fill up the memory buffer... this process repeats over and over. If you turn off the PowerSave option, the motor stays on at all times, constantly reading from the disc, constantly keeping the memory buffer full. This mode of operation uses up battery juice faster, but is recommended for use during jogging (or any other activity which would expose the player to constant shock). For reference, the Sony N1 does not have any option that is similar to the Sharp's PowerSave. The N1 (as most Sony portables) constantly operate in a "PowerSave-like" mode, but the newer Sony units use "G-Protection" which [supposedly] minimizes the recovery time of the optical head when the unit endures shaking while reading from the disc. The use of G-Protection in addition to the 16Mb (40 sec) memory buffer is supposed to completely eliminate skipping, even during active uses such as jogging; many users have indicated that G-Protection actually works as well as advertised. The D-Level option affects whether or not the digital recording level (for optical-input recordings ONLY) resets to plus/minus 0 after every recording, or stays at the current input level between recordings. The Light option is one that I think Sharp could have done a better job of implementing. The Light setting affects both the backlight on the remote and the LED on the USB terminal of the main unit. NORMAL will activate the backlight on the remote for a few seconds after every button push (on both the main unit and remote); the LED's will take on a "flashing" behavior, the pattern depending on the operation. ALL will keep the backlight on the remote on at all times IF THE UNIT IS RUNNING OFF OF AN EXTERNAL DC POWER SOURCE - otherwise the backlight will act as under the "Normal" setting, staying on for a few seconds after every button push. The LED's however stay on constantly during playback (blue) and recording (red), and flash different colors during other operations (too many patterns for me to detail). Setting the LIGHT option to OFF will turn both the remote's backlight and the main unit's LED's off at all times. Personally I would have liked to have seen seperate LIGHT settings for the remote's backlight and the LED's on the main unit; this was one of my qualms with the Sharp MT77 as well. Ideally I would like to be able to have the backlight behave under the NORMAL setting, but also turn off the LED's; unfortunately there is no way to do this.
Group Function OperationsWhen a minidisc is inserted into the MT880, it will automatically turn on GROUP mode if any groups on the MD are detected. You can turn the GROUP mode off by holding the remote's GROUP button for one second. There are various GROUP functions available from the EDIT menu, which are a bit different from the group options that are available on Sony units:
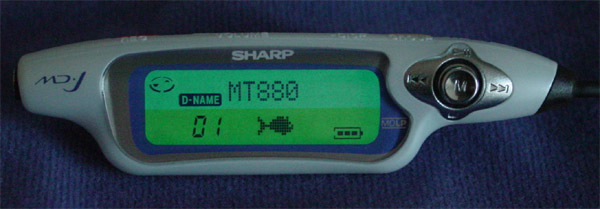
Group Name: Allows you to name the current group. Learning all of the group function commands can be a tall task. But rest assured, you can use the NetMD software interface to maintain and organize your groups; it is much easier to maintain groups by dragging and dropping in the OpenMG Jukebox software.
[ Previous Page - Next Page ]
|
|
Page 1 -
Page 2 -
Page 3 -
Page 4
Copyright © 2002 by Brian Y. Youn. All Rights Reserved. |

;)
;)
;)
;)
;)
;)
;)
;)
;)
;)