Index -
Page 1 -
Page 2 -
Page 3 -
Page 4
| IV. The R909's Sound |
First thing's first: If you want to do any sort of critical analysis on the R909's sound quality, don't use the included earbuds. Sony still includes the unimpressive MDR-E805's, which aren't absolute crap... but are close enough (the earbuds that came with my R900 last year are still in the box). I recommend getting a decent set of phones before coming to any conclusions about the R909's sound. Personally, I use a set of Sony MDR-E888SP's (Sony's top-of-the-line earbuds), and while they're a bit costly, I've never looked back. If earbuds don't suit you, try to find something that does.
 Bass and Treble Settings
Like the R900 (and a number of other recent Sony units), the R909 allows you to adjust both the bass and treble in 8 steps (from "-4" to "+3"), and store two presets in memory (under SOUND1 and SOUND2, accessible from the SOUND option in the jog dial menu). While the R900 only allowed these settings to be changed from the remote, the R909 allows the user to change these settings from the main unit (and by making full use of the 3-line display and control pad, Sony has made this extremely user-friendly). When you enter a disc's settings in to the PERSONAL DISC MEMORY, both SOUND presets are stored, so that the next time you put the disc into the unit, the bass and treble settings are automatically set back to how they were when entered into disc memory. (Unfortunately, the bass and treble settings stay there even when you take the disc out and put a new one in, unless the next disc has its own SOUND settings in disc memory).

 Loudness
The R909 appears to have about the same max volume as the R900, however the AVLS cutoff is at volume 20/30, whereas on the R900, the AVLS cutoff was set at 23/30. The volume at the AVLS level on both units is the same, which is to say that the R900's volume simply increases more sharply in the last 7 steps than the R909's volume. There is still a bit of distortion in the highest volumes, not much different than on the R900. The volume should be adequate for most users. The line-out mode works well when using the R909 with a shelf system or receiver, but it is not quite as loud as a Sharp unit's line-out mode. For more details on how the R909's LINE OUT mode works, click here to go to the LINE OUT section.
 Recording Quality
While Sharp has a reputation of making better machines for live/microphone recording (Sony's getting cheap with their mic-input amps in post-R55 units doesn't help), Sony seems to have a better track record with most users for pure music recording (from CD's or other pre-recorded sources). Sharp's ATRAC encoding process has been known to introduce more artifacts into recordings (usually characterized as a "sparkling" phenomenon) than the Sony versions of ATRAC (although Sharp makes up for some of it by using more powerful headphone amps than Sony), and Sony is finally putting ATRAC Type-R into the R909. Available for years in Sony's line of home MD decks, ATRAC Type-R improves the encoding performance in high-frequency passages. To be honest, I don't think that most users will be able to tell much of a difference between recordings made on an R900 and those made on an R909. The improvement is fairly minor, and I don't really feel that the addition of the Type-R DSP is sufficient reason (by itself) to upgrade to the R909. Note that since Type-R is the latest version of ATRAC (and not ATRAC3), MDLP recordings do not use the Type-R encoder. To read a short blip from Sony explaining ATRAC Type-R, click here.
The quality of the mic input is decent - on par with the R90 and R900 mic preamps, though not quite as good as those found on Sharp units. If you record mostly lectures, interviews, or other types of speech, then the mic-recording quality shouldn't be a problem. And if you use a decent set of microphones, you can do some pretty good music recordings as well (although an external mic preamp is recommended for the best results). However if you consider yourself to be an ultra-critical live music recording enthusiast, and if microphone recording quality is absolutely your top priority, you may be better suited going with a Sharp unit, since Sharp units typically supply a higher bias voltage to the mic input. Also, Sharp units allegedly use more bits for their analog-to-digital converters (ADC) than Sony (although I don't know the exact specs to prove this). Though the Sharp flavors of ATRAC have had more problems than the Sony versions, this is really only an issue with extremely golden-eared listeners.
 "But doesn't Sharp use 24-bits?"
I've gotten questions from a number of users (usually newbies) that say that they have heard that Sharp units have "24-bit" recording capabilities, while Sony only has "16-bit" recording (sigh); this is a combination of hype and misinformation. When Sharp says "24-bit" recording, they are referring to the wordlength used for calculations during the ATRAC process (I would guess that Sony uses at least a 20-bit wordlength, as a 16-bit wordlength would result in truncation errors, but AFAIK, Sony doesn't make this information available). Recording depth on both Sharp and Sony units is 16-bit/44.1 kHz (a la CD audio). I managed to find a post on alt.audio.minidisc by a user discussing "24-bit recording" capability, which I have linked here. Now while Sharp units typically yield better-sounding microphone recordings, this is more likely due to the difference in the quality of mic-preamps, rather than the number of bits used in the ADC (does anyone have any solid numbers on the bittage of Sony and Sharp's ADC's?), and is certainly not a product of "24-bit recording".
| V. Battery / Power Supply Details |
For the fourth consecutive generation, Sony uses the tried and true NH-14WM "gumstick" rechargeable battery. This battery is a Nickel-Metal Hydride (NiMH) cell which will last through approximately 300 complete charge cycles. As NiMH rechargeable go, it is best to occasionally discharge the batter fully before recharging it. Repeatedly "topping-off" the battery may shorten the life of the rechargeable and develop a "memory" effect. Sony and Sharp now both use NiMH cells for their top-of-the-line portable MD recorders (although Sharp made the switch from the more expensive--but longer lasting--Lithium Ion cells just last year, with the MT66/77, whereas Sony first made the switch to NiMH with the MZ-R55 in 1998). If you're new to MD and are wondering why MD units don't use Li-ion cells (they do last longer than their NiMH counterparts after all), it's mainly due to cost - NiMH cells are roughly half the cost at comparable specs. Li-ion cells are also more volatile and (as I have heard from some users) don't work as well at extremely cold temperatures. In any case, with 20+ hours of playback on an NiMH cell, there really is no reason to complain about battery life.

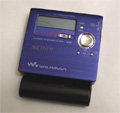

As usual, Sony provides an external AA battery pack which can be attached to the bottom of the unit. It is the same battery pack that came with the R900 and R90/91, and the connectors are exactly the same. The AA by itself goes for a quoted 34 hours of playback in SP mode. The table below outlines the battery life for playback and recording, for all three modes (SP, LP2, and LP4). Also note that these are the quoted figures for battery life (measured under a controlled environment). Everyone should know that in "real-life" usage, you won't get 24 full hours of playback with the NiMH alone (although I haven't done any marathon tests, I would guess the practical figure to be around 16-20 hours of playback).
|
Sony MZ-R909 Battery Life |
NH-14WM (playback / recording) |
AA battery (playback / recording) |
NH-14WM + AA (playback / recording) |
|||
|
SP: (stereo or mono) |
24 hrs | 8.5 hrs | 34 hrs | 7.5 hrs | 64 hrs | 20 hrs |
| LP2: | 27 hrs | 11 hrs | 40 hrs | 12 hrs | 75 hrs | 28 hrs |
| LP4: | 31 hrs | 14 hrs | 45 hrs | 15 hrs | 84 hrs | 37 hrs |
 Charging the Battery
The internal battery can be recharged in one of two ways:
The "traditional" method:
You can plug the AC adapter directly into the unit and push the STOP/CHARGE button (the "down" direction on the control pad). The first line of the display will flash the word "Charging" and the battery icon will animate as if it's filling up (just like the R900). This method will take approximately 3.5 hours to fully charge a fully depleted battery.
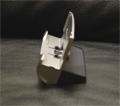
In another "first" for Sony portable recorders, the R909 comes with a charging cradle. The cradle actually comes out of the box as two separate pieces and requires a little "construction" (if you would even call it that - the two pieces actually just snap together). The dark gray base contains the charging circuitry, while the silver stand simply gives the MD unit something to sit on. The charger uses the same connections as the external AA battery pack (if you own an R90 or R900, you may have tried connecting the external AA pack and let the unit sit with an empty NiMH inside... this will actually charge the internal battery!... but it will also deplete the AA ^_^). The AC adapter plugs into the back of the base, and a "CHARGE" light shines through a hole on the stand when a unit is charging in the stand . Note that this method takes about 6 hours to charge a fully depleted battery, so using the AC adapter directly into the unit is significantly faster. But if you're into the habit of recharging the battery overnight, using the charging stand should suffice. You can use the unit normally while it is on the stand, but it will not charge unless you turn the unit off. And despite anything Sony might "officially" say, the R909's charging cradle works fine with the R900.
| VI. Remote Control |


The R909 uses the same remote control as the R900, and it works basically the same way as it did on the R900. The remote connects to the R909 using the proprietary 4-pin connector, along with the standard 3.5" stereo miniplug (you can use a set of headphones directly into the unit, without using the remote). The headphone jack on the remote also accepts a standard 3.5" stereo miniplug. The remote might feel a bit heavy if you just let it hang down from your headphones (especially if you are using earbuds), but the clip is very sturdy and will hold the remote firmly to a shirt collar or pocket.
Sony has added a some minor features to the R909 via the remote, most of which involve the group function in some way. While the new Sharp MT770 has added a record button to the remote, Sony still does not allow you to start recording from the remote (this is probably to prevent accidents from happening however). The remote's LCD has a 9-character text display, and shows vital information such as battery life (via a 4-step battery icon), sound setting, and playmode. The remote's LCD still has a blue-green backlight, which stays lit for 3 seconds following a button push.

 Available Menu Functions from the remote
With the exception of the ability to start recording from the remote, the R909 allows the user access to almost all major functions, as well as one major function (SPEED/PITCH control) that can only be controlled from the remote. Holding down the PLAYMODE button for 2 seconds is equivalent to pressing the GROUP button on the main unit - doing so will allow you to navigate through the different groups on the disc (note this is not equivalent to holding the main unit's GROUP button for 2 seconds, but equivalent to pushing it and letting it go quickly). Holding down the SOUND button for 2 seconds allows you to adjust the BASS and TREBLE settings.
The remote's menu is accessed by holding down the DISPLAY button for 2 seconds. Navigate the menu by turning the head of the remote, and select an option by pushing the large STOP button at the end of the remote's head. Note that while you are in the remote's menu, the controls from the main unit will be locked until you exit the remote's menu, with the exception of the volume buttons and the CANCEL button. The following diagram maps out the options available from the remote's menu.

 Index/Time Search
One feature that Sony has added to the remote is a SEARCH option, which can be set to either TIME or INDEX. While some users thought that this "index search" function would allow the same functionality that you have with the jog dial on the main unit (that is, being able to search through the track titles during playback), this isn't really the case. Basically this option controls the way the |<< and >>| controls on the remote work while paused during playback.
If this option is set to TIME, then the remote acts as it did with previous models. While paused, if you hold the |<< or >>| (by turning the head of the remote in the respective direction), the unit will fast-forward (or fast rewind, depending on which direction you are holding).
If this option is set to INDEX, holding |<< or >>| on the remote while paused will browse through the track titles, but again, this is only while playback is paused, and doesn't work during actual playback. Well, how is this any different from simply repeatedly turning the head of the remote and searching for a track manually? Why didn't they just implement a way to search through the track titles during playback? Bottom line: if you read "index search from the remote" on the R909's press release, you were probably expecting something different.
 Images:


