Table of Contents
Next page

Unpacking
Check that you received the following items:
- Audio connecting cords (2)
- Optical cable (1)
- Remote commander (remote RM-D9M (1)
- Sony SUM-3 (NS) batteries (2)
Inserting batteries into the remote
You can control the deck using the supplied remote. Insert two R6 (size-AA) batteries by matching the + and - on the batteries. When using the remote, point it at the remote sensor  on the deck.
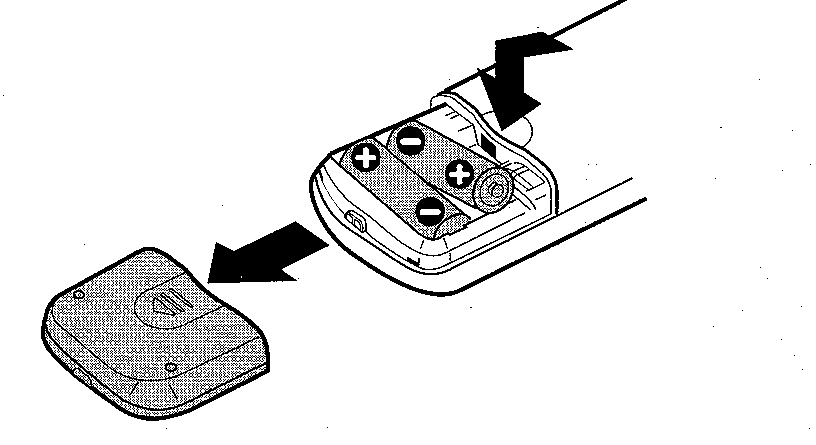
 When to replace batteries.
With normal use, the batteries should last for about six months. When remote no longer operates the deck, replace all the batteries with new ones.
Notes
- Do not leave the remote near an extremely hot or humid place.
- Do not drop any foreign object into the remote casing, particularly when replacing batteries.
- Do not expose the remote sensor to direct sunlight or lightning apparatuses. Doing so may cause a malfunction.
- If you don't use the remote for an extended period of time, remove the batteries to avoid possible damage from battery leakage and corrosion.
Hooking up the System
Overview
This section describes how to hook up the MD deck to an amplifier or other components such as a CD player or DAT deck. Be sure to turn off the power of each component before connection.
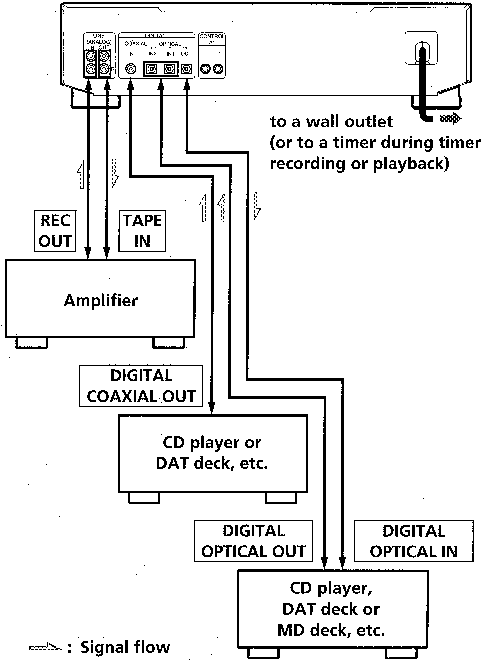
What cords will I need?
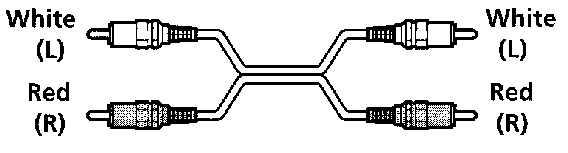
- Audio connecting cords supplied
- Optical cable (only one supplied) (3)

- Coaxial digital connecting cable (not supplied) (1)

Hookups
Connecting the deck to an amplifier
Connect the amplifier to the LINE (ANALOG) IN/OUT jacks using the audio connecting cords (supplied), making sure to match the color-coded cords to the appropriate jacks on the components: red (right) to red and white (left) to white. Be sure to make connections firmly to prevent hum and noise.

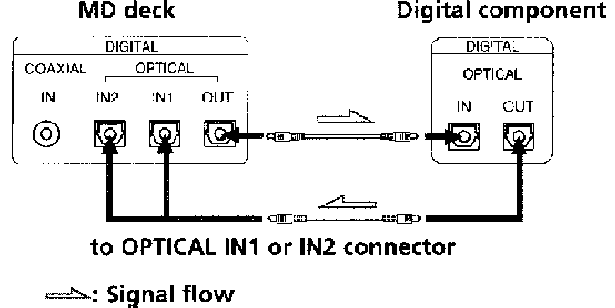
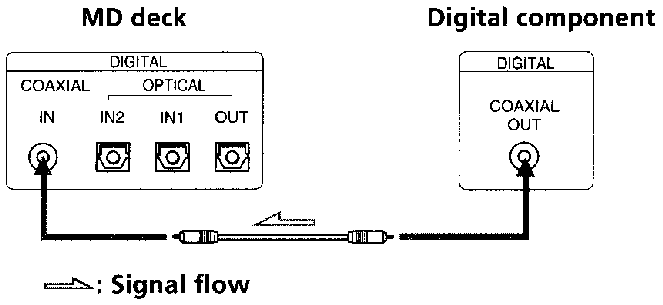
Connecting the deck to a digital component such as a CD player, DAT deck, digital amplifier, or another MD deck.
Connect the component through the DIGITAL OPTICAL IN1/IN2/OUT or DIGITAL COAXIAL IN connectors with two (or three) optical cables (only one supplied) or a coaxial digital connecting cable (not supplied).
- Connecting the optical cables
Take the caps off the connectors before plugging in the cables.
- Connecting the coaxial digital connecting cable
Automatic conversion of digital sampling rates during recording
A built-in sampling rate converter automatically converts the sampling frequency of various digital sources to the 44.1 kHz sampling rate of your MD deck. This allows you to record sources such 32- and 48- kHz DAT or satellite broadcast, as well as compact discs and other MDs.
Notes
- If "Din Unlock" or "Cannot Copy" appears in the display recording through the digital connector is not possible. In this case, record the program source through the LINE (ANALOG) IN jacks with INPUT set on ANALOG.
- When recording through the DIGITAL OPTICAL IN1/IN2 or DIGITAL COAXIAL IN connector, you cannot adjust the recording level.
Connecting the AC power cord
Connect the AC power cord to a wall outlet or to the outlet of a timer.
Turning on the unit (except for Canadian model)
Set MAIN POWER on the rear of the unit to ON. The unit is turned on in standby mode.
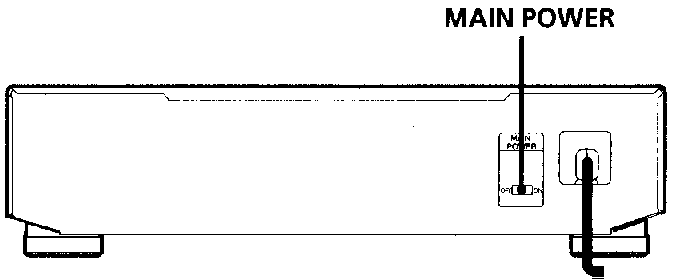
Table of Contents
Next page
HTML-ized by Mario Zlatovic