Sony MDS-PC2 Review
Timothy P. Stockman
January 2000
Timothy P. Stockman
January 2000
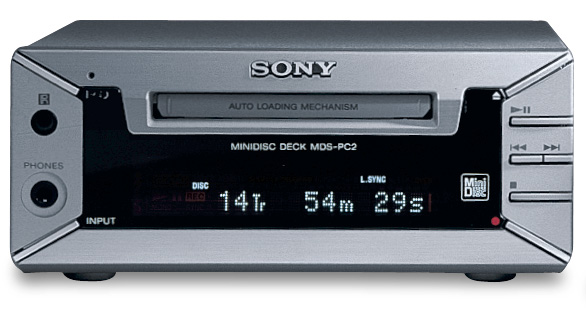
Physically, the front panel of the MDS-PC2 is slightly larger than a half-height 5.25 floppy drive. Along the left side is (from top to bottom) the Power button (standby/operate), the IR sensor for the remote, a mini-phone jack for headphones and the Input selector (analog/optical 1/optical2). Buttons on the right side are (top to bottom) are Eject, Play/Pause, Back, Forward, Stop and Record. The front panel Back and Forward buttons operate like those on a portable. That is, pressing quickly causes it to skip to the next/previous track (the |<< and >>| functions), while holding the button down gives foward and rewind (the << and >> funtions). However, the buttons on the supplied remote are like a normal home deck. That is, there are four separate buttons: |<< >>| << >>. Also on the front panel is a 1-line flourecent display, similar to the displays on normal Sony home MD decks. The case is surprisingly deep. On the rear panel is a non-detachable mains cord, two mini phone jacks wired in parallel for the Control A1, a TOSlink optical output, 2 TOSlink optical inputs and 4 RCA jacks for the analog line inputs and line outputs.
The deck itself is electrically very similar to the JE520 in my stereo system. It uses ATRAC 4.5 and produces 20-bit digital output. The front panel controls are very limited (there's no menu button, for instance), but all of the controls that I have come to expect on a home minidisc deck are available on the supplied IR remote. Operating the MDS-PC2 from the remote is almost identical to operating the JE520. Most features I tried operated flawlessly, however the A-B erase mode (which I use to trim off the excess recording at the start of the song) seemed to crash when I tried to move the "B" edit point forward a frame with the >>| button. While not essential for playing discs, the remote is needed when recording if it is necessary to access the level meters (with the display button on the remote) or adjust the record level.
The computer interface is a small box labeled "Vision Touch CAV-50C". It has an attached 1 foot cable with DE-9F for connection to the computer's serial port and a single mini-phone jack for connection to the Control A1 cable from the deck. It contains an NEC 78082GA26 single chip CPU, a Maxim 3221 RS232 interface and various other parts. It requires no external power; it is powered by the DTR line from the computer. The interface only works with a normal PC-type serial interface; it will not work with high-speed PCI serial cards.
The installation instructions suggest using analog audio connections to the computer. At first I thought this strange, but given the experiences I've had the past few weeks, I can see that they do this because they can be sure it will work. I have been unsuccessful with connecting the S/PDIF output from my Samsung SC140 CDROM because it, like most other CDROM drives, only outputs valid S/PDIF data when playing, not during stop, pause or seek. This is unusable with Sony's drag-and-drop software. The digital inputs on the MDS-PC2 seem also seem to have a problem accepting 16-bit S/PDIF from my M Audio DIO2448 sound card, although the DIO2448's S/PDIF input does accept the MDS-PC2's output (at least 16-bits of it; Cool Edit 2000 is prone to skipping (probably needs something faster than my 433 Celeron) if I use it's 32-bit mode, which is necessary to completely capture to 20-bit output of the MDS-PC2). The MDS-PC2 *does* accept the 16-bit S/PDIF from the CS4299 codec on the computer's motherboard. Sound confusing? That's probably why Sony recommends analog!
The PC software comes on a CDROM along with a label making program and a user operation manual in PDF format (the only written instructions that come with the software are the installation instructions). Installation is very simple, just insert the disk and click on the install buttons. Operation is fairly intuitive. Upon starting the MD program, you are presented with a "remote control" bar that has title readout, running time, and play, stop, next track previous track buttons. There's also a unit select drop down box on the left that allows you to select the device you're controlling: the MD deck, the CDROM drive (PC CD) or an external CD player (via Control A1). For more complex functions, there's a drop-down button on the right that brings up an "edit" menu bar with, from which you can select the MD edit window, an edit window for an external CD player, an edit window for the CDROM player, an edit window that has the external CD and the MD for drag-and-drop copying from CD to MD and an edit window with the CDROM and MD for drag-and-drop. Some may find mildly annoying the fact that *all* windows in the program are fixed size and cannot be resized, but usually it's not a problem.
Hands down, the best feature of the MD edit window is the track titling feature. When a minidisc is inserted, the existing title information is read from the disk into the title area of the window. Not only can you enter/edit titles from the keyboard, but you can prepare a file ahead of time with 1 track title per line, copy it to the Windows clipboard from the editor (notepad, for exampe) and paste it into the track title area of the MD edit window! Right click and you can save the track window to a CSV file. Buttons for all the minidisc editing features like A-B erase, track erase, move, etc. are there. They generally work well, however I must say that I prefer doing A-B erase on my JE520 using the jog knob; its a lot more precise than the slider window in the MDS-PC2's program.
Although I don't have an external CD player with Control A1, they seem to have put a lot of thought into the CD window. It can control a multi-disc changer as well as a single disc player. It, like the MD window, has a title area that can be edited. I don't know whether it stores the titles in the player's Favorite Track Select memory or in a file on the computer. The CDROM editor window is just like the CD window, although the manual doesn't give any indication that it can control multiple CDROM drives or multidisc CDROM drives and I only have one in my system so I couldn't experimentally determine this. In any event, it operated the CDROM drive flawlessly.
The final 2 windows are the CD to MD and CDROM to MD drag-and-drop windows. They allow you to build compilation disks track by track. After you've done the drag-and-drop to indicate which tracks you wish recorded in which order, you can hit "Start" and the program will do the rest. It even copies the track titles! However, it appears that all tracks must be recorded with the same record level setting; there's no provision for adjusting levels on a track-by-track basis. Some may be disapointed to learn that all copying is done at 1X speed... I've not tested drag-and-drop window yet because of the previously mentioned S/PDIF problem with my CDROM drive. While this is a common problem with CDROM drives, I think it is very rare with audio CD players. That, along with the multidisc capability, is probably why Sony added the ability to use an external CD player. (Hmm... maybe I should think about getting a CD changer!)
The final button on the MD edit window is the "Print" button, which launches the label maker program. I haven't done much more that print a sample label to see what it looked like... It produces a disc label, a case label and two edge labels. As expected, very small print due to the MDs small size. The label program has a way of putting graphics on the label, which I did not try. But it looks promising...