Another cheap solution for connecting to a Sony optical miniplug input.
By Thomas de Bruijn
Soundcards with digital out are dirt cheap nowadays. Yet, the temptation always remains to build a cheap and bit-perfect solution for digitally copying music to a minidisc recorder. This is a brief outline of the construction of a cheap Toslink connection between the digital out of a CDROM player or any other digital source that has a coax TTL signal output and a portable Sony Minidisc recorder with minijack optical input. On this page, I found the materials needed to make the cheap Toslink-set: http://members.tripod.com/~Psych/super-cheap-toslink.html. As indicated there you need 1 LED and a 120 Ohm resistor. The scheme for this connection is drawn in a picture on that page and copied here:
Please follow the instructions mentioned on the site to connect the LED. The only problem you will have after making this setup is connecting it to the Sony miniplug optical input. In addition to several solutions mentioned on the site, a new solution came to me after having messed up a miniplug audio-connector in an effort at drilling a hole through it to copy the make of a Sony plug. I was left with the shell of the plug and found it fitted perfectly to the Toslink-input side of the Sony cable, giving me a firm connector for the optical cable and a casing for the LED.
After soldering the LED and the resistor to a piece of coax cable, I fitted everything neatly into the plugshell and connected it to the optical cable. After connecting the other end to the digital output of the CDROM player, and plugging in the miniplug-end of the Sony cable to the recorder input, I had a clear signal and my Sony RZ-57 recorded without a glitch. The signal is strong enough, even though some light escapes from the shell as the connector does not cover it completely, but it works and costs nothing to build. The connector is held firmly in place by the inside ribbons on the plugshell and does not wear from being inserted or pulled out, so no risk to the original Sony cable.
Here are some pictures of the various elements and how they fit together. The soldering is quick and dirty and the isolation should be refitted with shrinkwrap material, but this is just an early stage and -- it works!
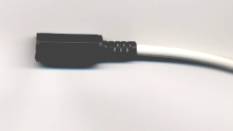
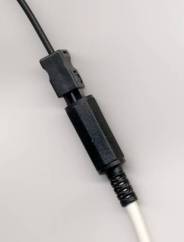
The shell at the end of the coax-cable with all the parts neatly covered.
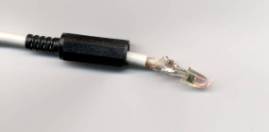
The inner parts and the LED in action.
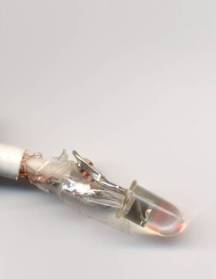
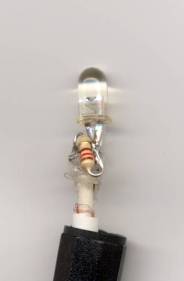
Details of how the LED and the resistor are soldered to the cable and made to fit the plugshell.
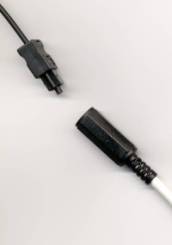
The plugshell and the input from the Sony-cable. Connected and working!!
Good luck!
Any tips or questions, email me.